Welcome guest, is this your first visit? Click the "Create Account" button now to join.
Results 1 to 1 of 1
-
21st December 2018, 12:51 PM #1
 Tuto Make Animated BMP for iGO Step by Step


This is a topic that has been discussed several times on the site, in this Tuto I will try to make an accessible summary for the majority of members I hope.
To have an animated image in iGO you need two files in the folder:
ux.zip \ ui.nextgen \ res \ common or the_brigth orthe_dark \ ...
Both files must have the same name in my case: my_flag.bmp and my_flag.spr
Prerequisites:
Adobe Illustrator preferably latest version (Mine is too awake .... but it is enough): to add the different images and convert to PNG.
Dview: Now no longer present Thank you Djeman to convert to BMP
Notepad ++: to edit the .spr file
Images: must be strictly the same size Width = w and Height = h
Objective: To make an animated sequence made of ten images (I insist on the same size h and w)
Realization: Step by Step:
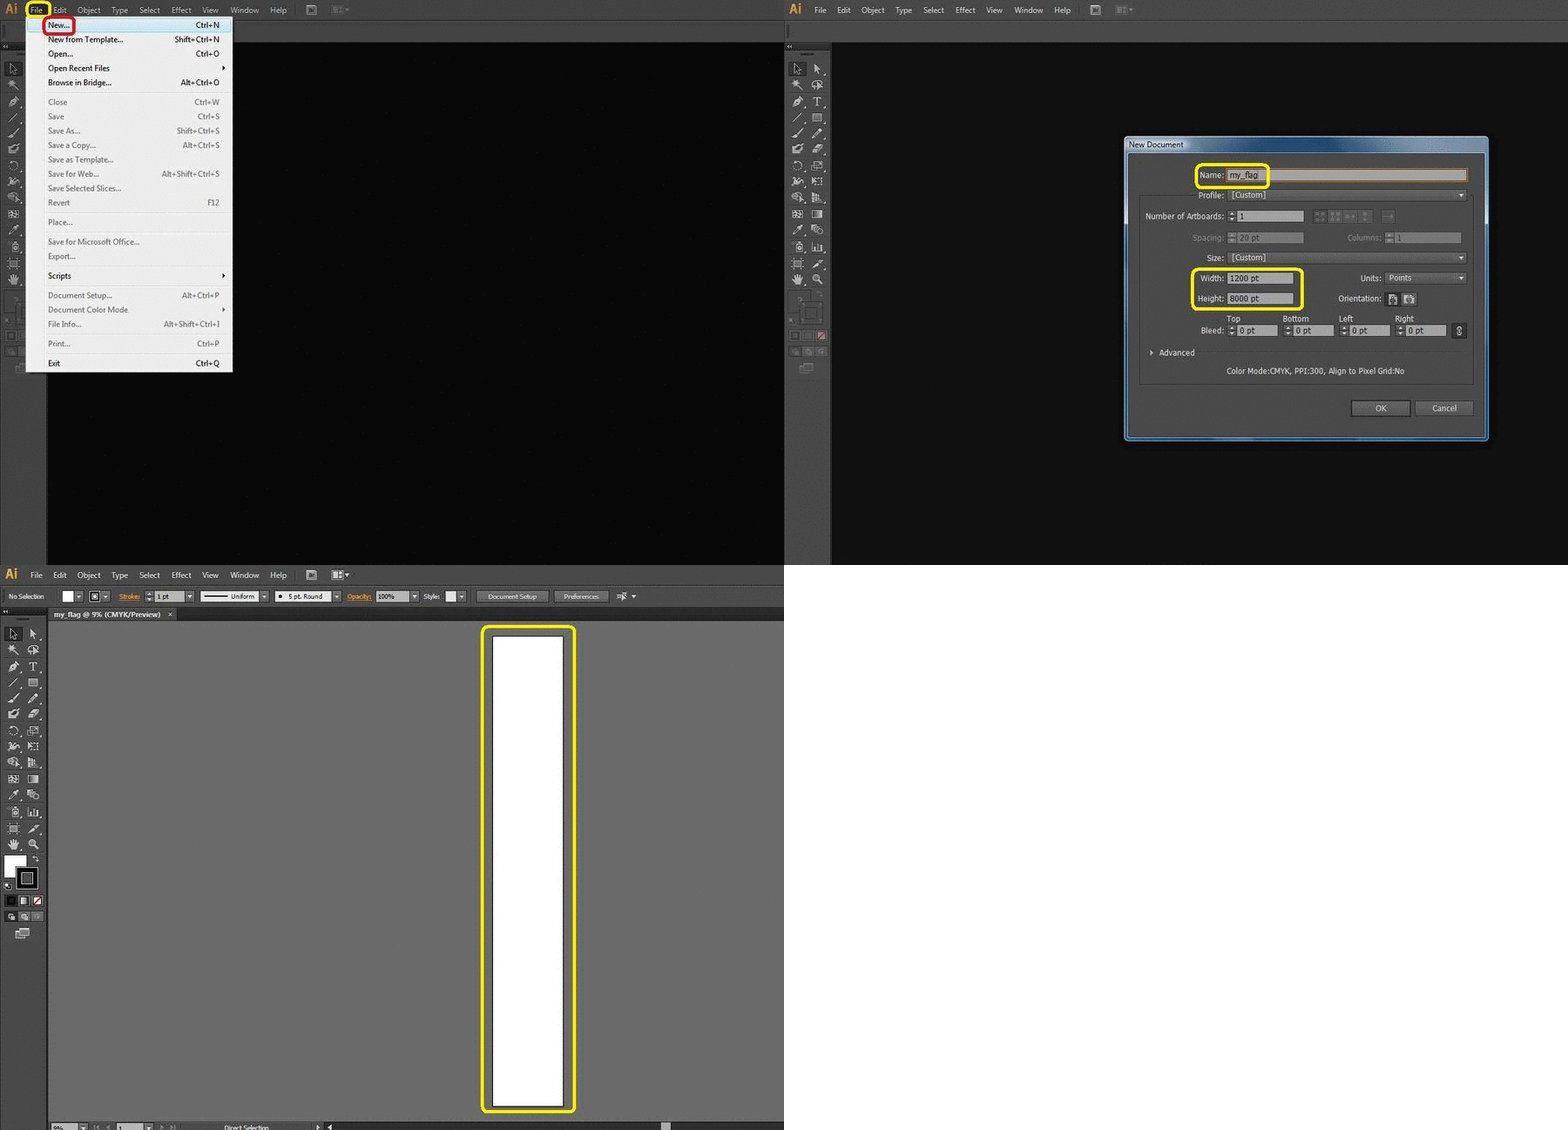
Open Adobe Illustrator: File / New
Name your sequence: my_flag
Enter the Width = w equal to the width of one image
Enter the Height = 10 X h to be able to incerate the ten supersposed images
Click: OK we get an empty layer
Spoiler: GIF 1
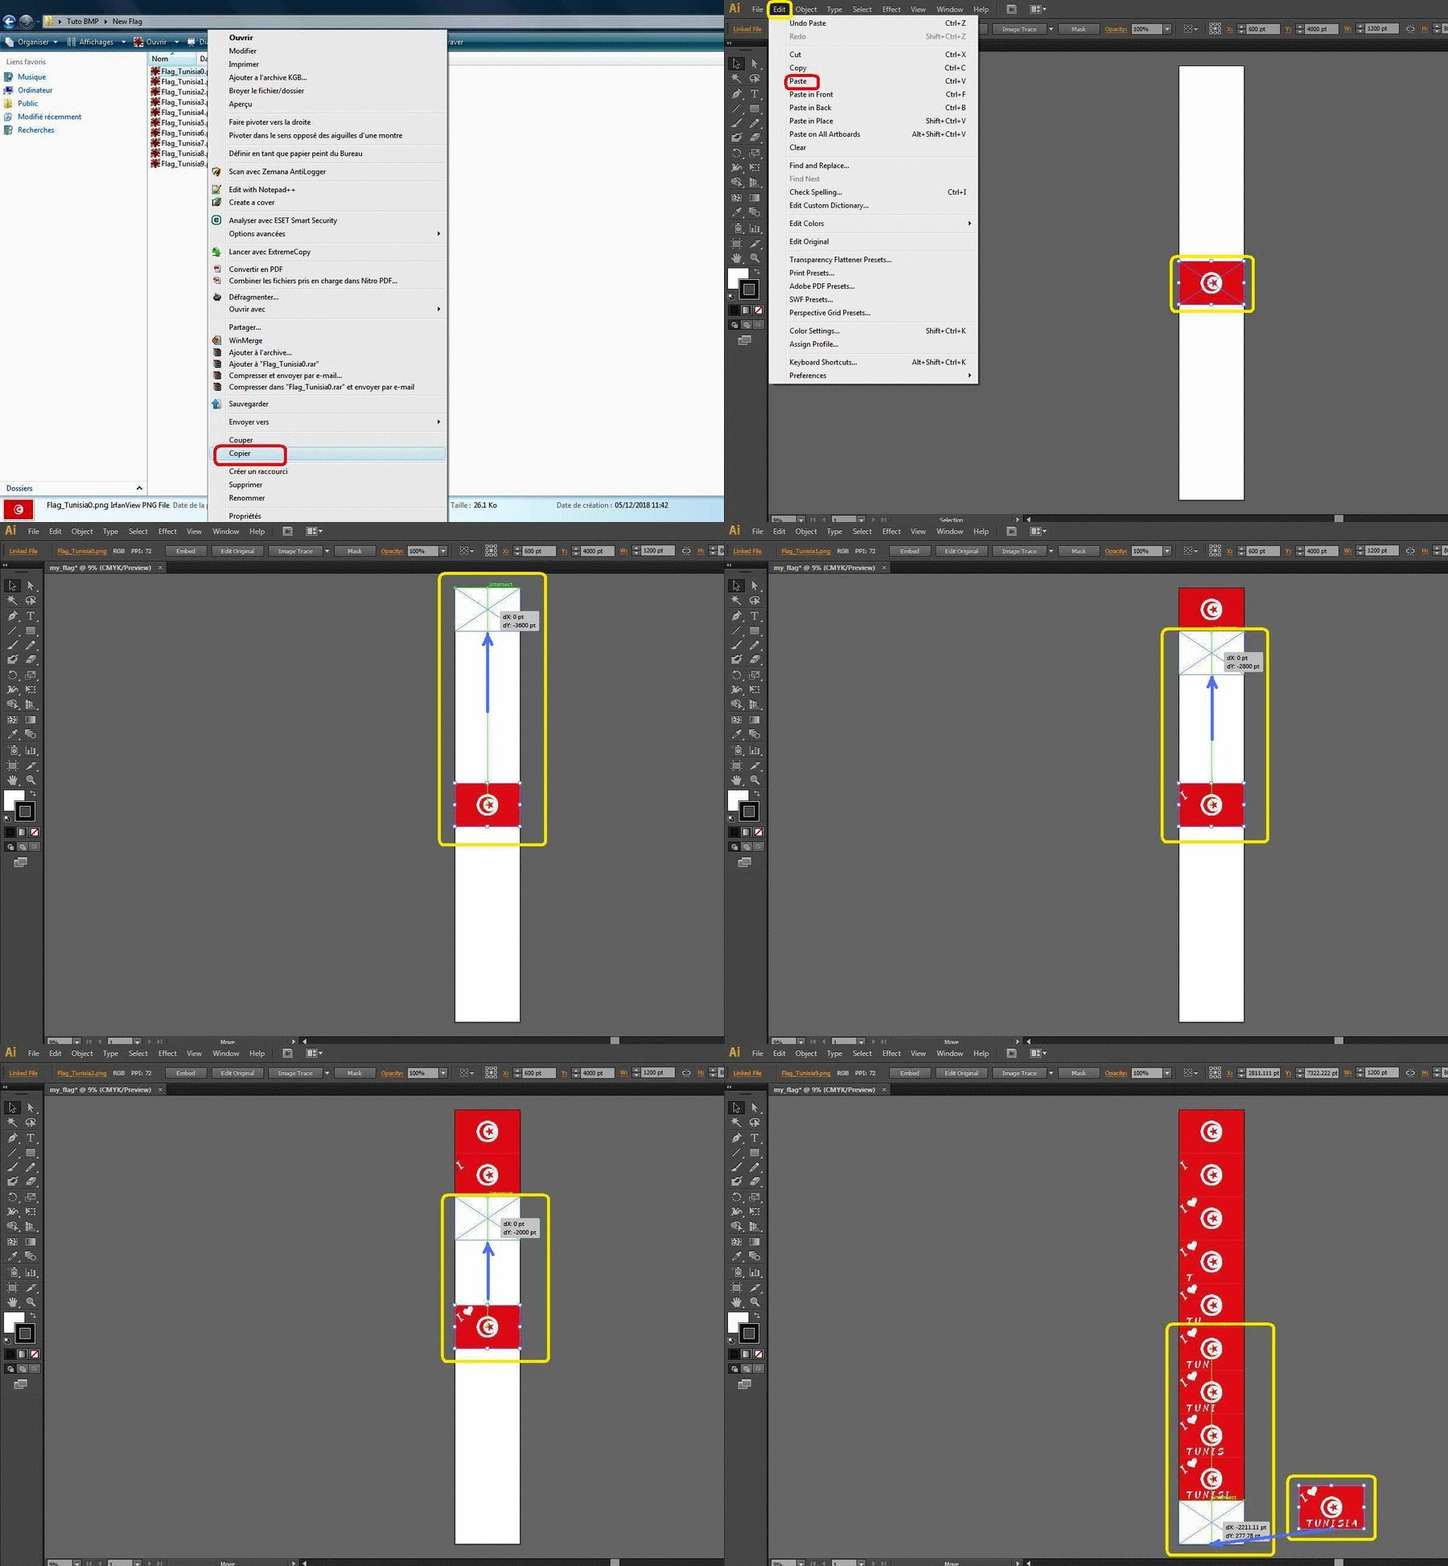
I take the images: one by one by Right click and Copy And in Adobe Illustrator Edit / Paste and then moving them by Drage-Removal with the efffect axial magnet they will be superimposed without problem.
Spoiler: GIF 2
Do not forget to save all your work as you go
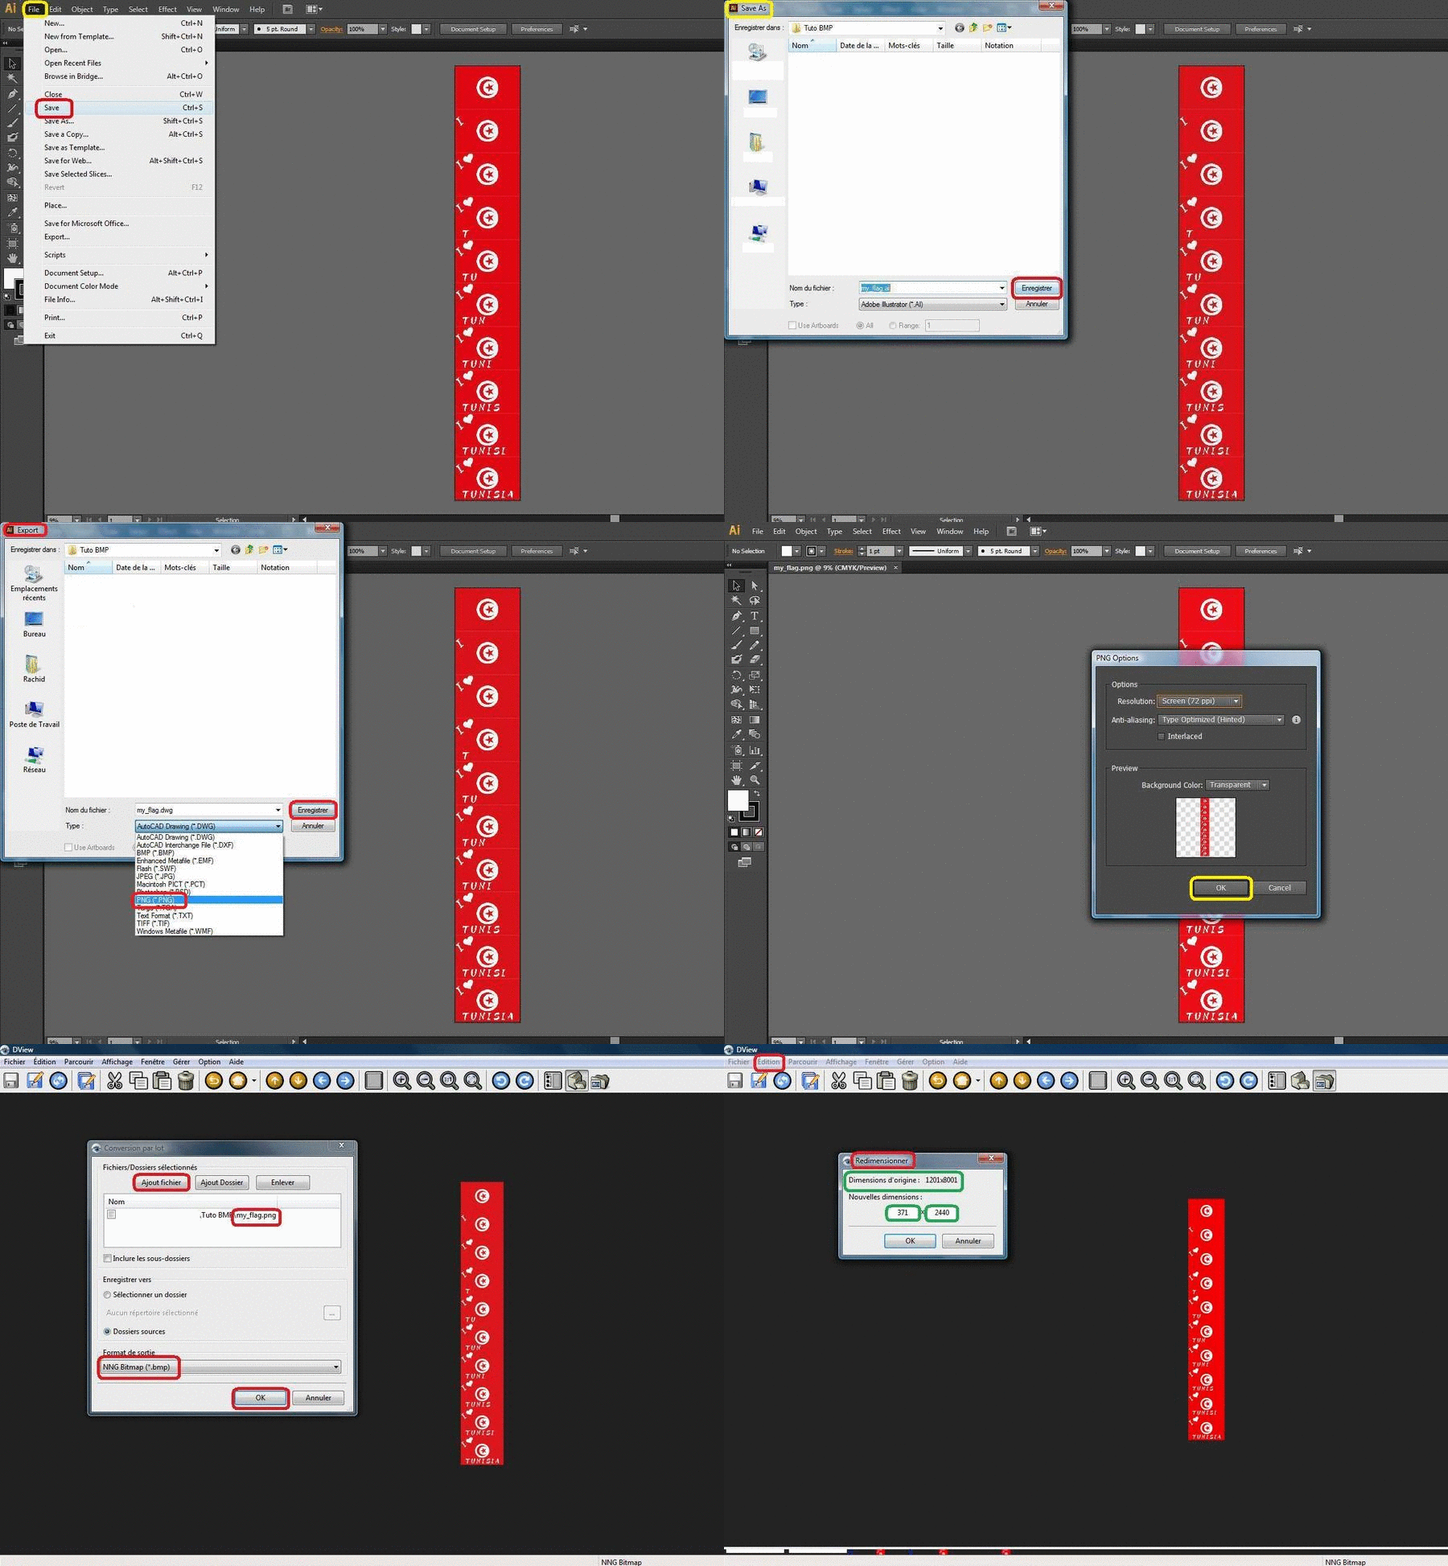
At the end you get a file: my_flag.ai you have to export it to PNG
Open Dview: File / Open my _flag.png
Edit / Convert By Lot / Add File by Drag / Paste
Output Format: NNG Bitmap (* .bmp) / OK
At the end we can resize the image: Edit / Resize in this case be careful you have to consider (New h) for the file.spr
Spoiler: GIF 3
The .spr file must have exactly the same name as the .bmp file: in my case: my_flag.spr
We can edit it with NotePad ++ and we get:
Each image of the sequence is assigned an alphabetical letter: ABCDEFGHIJ (so for 10 frames on 10 alphabetic letters).BmpFlags = 0
DefFlags = ALPHA_PIXEL | ALPHA_LAYER
DefPhase = 0
STRIPES = 244
Animation = "flag", 30, "A", "ABCDEFGHIJ"
STRIPES = 244 ==> h = Height of one frame (Attention to take into account if you redimmentionned the image)
DefAlpha = xx ==> Play on the transparency of the icon display
Animation = "flag", ==> flag: will be used when calling this image in the code
Animation = -, 30, ==> 30 = 30 tenths of seconds Delay between two frames
Animation = -, -, "A" ==> Beginning of the animation by the image corresponds to the letter A
Animation = -, -, "A", "ABCDEFGHIJ", ==> Sequence of passage of the images: in my case it is in the normal alphabetical order.
To blink an image: we put in the BMP, the base image and for the second image, a transparent background. And the animation on two images.
This same method is used to prepare Speedcams BMPs.
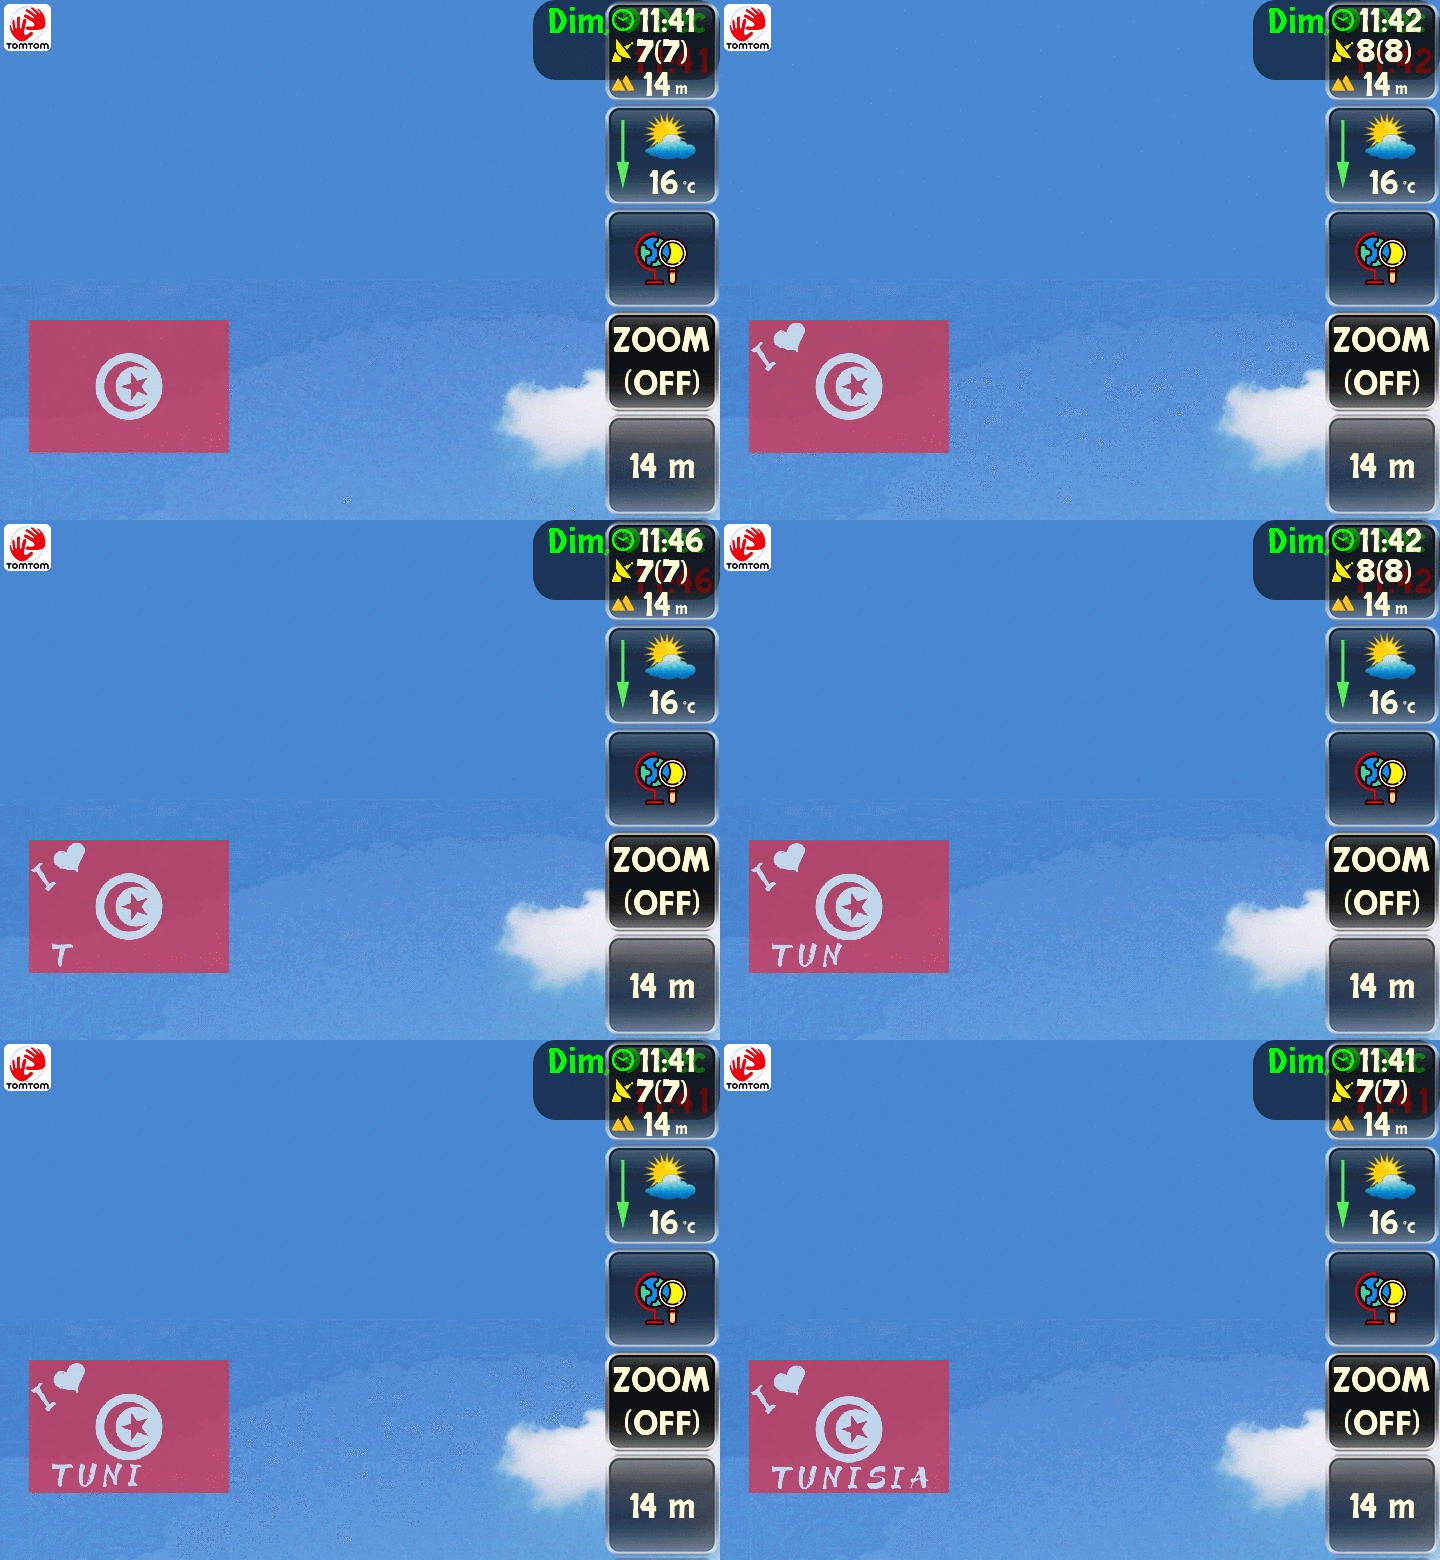
Here is the result of the image embedded in a UX
Spoiler: GIF 4
This tutorial is long probably requires other points to clarify I count on your participation.
RegardsLast edited by LouBouha; 9th December 2020 at 12:32 PM. Reason: Renewal of Pictures
GPS: TomTom ONE
Smartphone: THL T11 Android 4.2.2 Resolution 720x1280
Sygic 14.3.4 IGO Primo 9.6.29.636868 Skins : Doupas V9.0h , Dimka/Frontzosd


 Likes:


 Reply With Quote

Bookmarks